
What you are looking at
Each case shows a tooth before and after treatment. The bright white lines in the “after” x-ray are the filled and sealed canals. Look for narrow, curved canals that follow the natural shape of the root. That means less tooth was removed and the tooth stays stronger.
Case 1: A complex lower molar
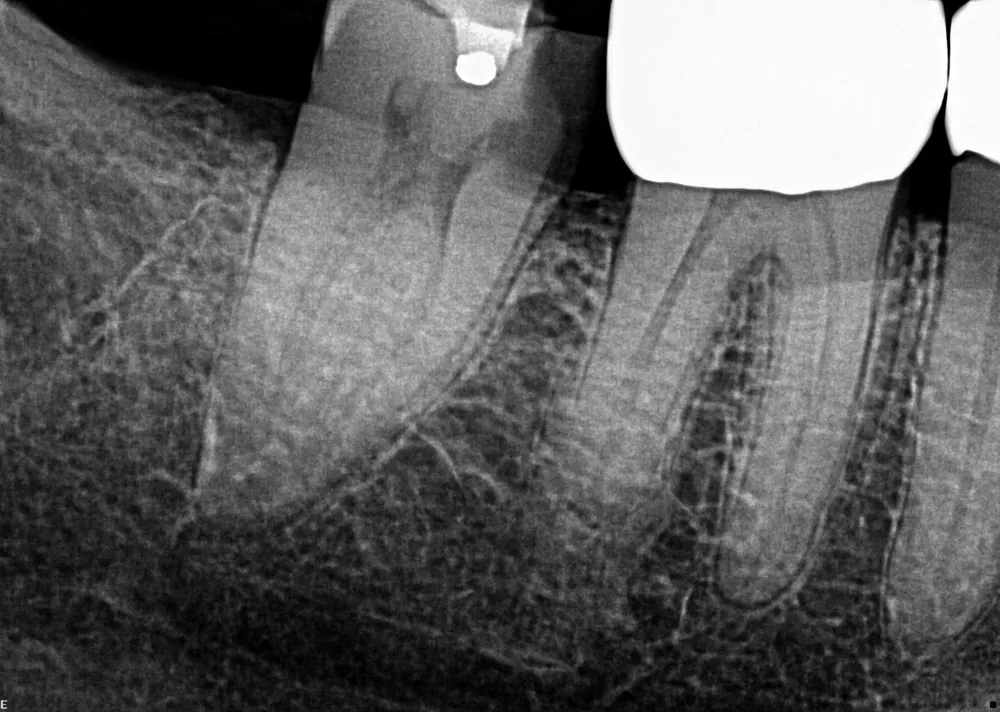
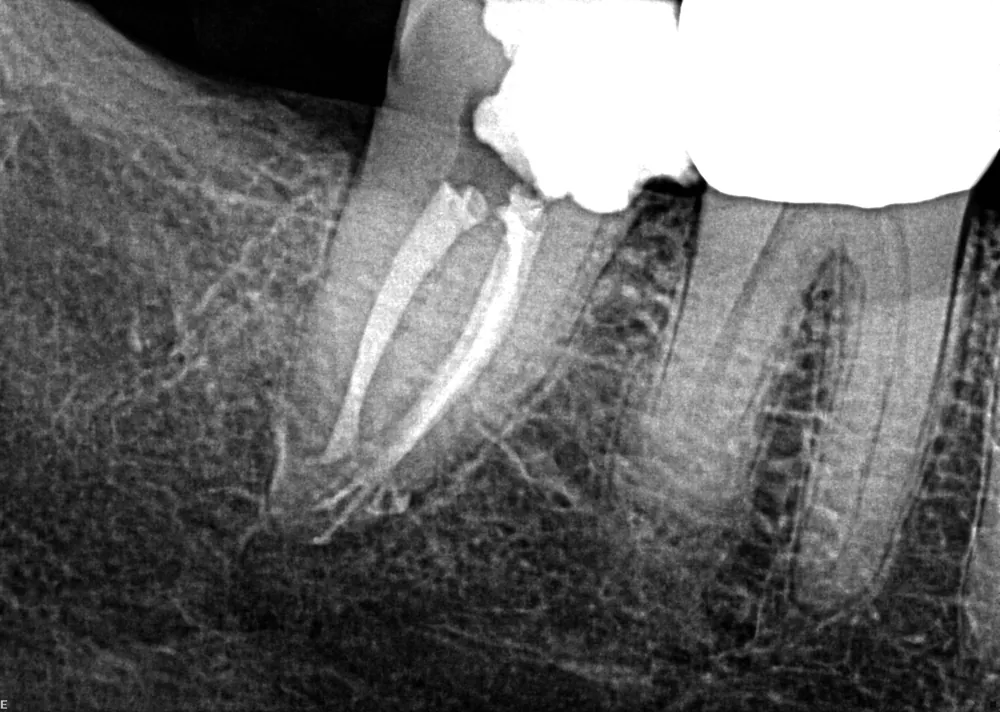
This lower molar had canals that do not follow a simple path. Two canals divide and then rejoin partway down the root, and near the tip they split again into several tiny branches. On the “before” x-ray the canal seems to vanish partway down the root, a classic warning sign of a split. Using the microscope and 3D imaging, each branch was found, cleaned and sealed. In the “after” x-ray you can see the filled canals and the fine white branches at the root tip.
Why it is complex: hidden canals that are missed are a common reason root canal treatment fails, so finding all of them is the key to a tooth that lasts.
Case 2: Upper molar
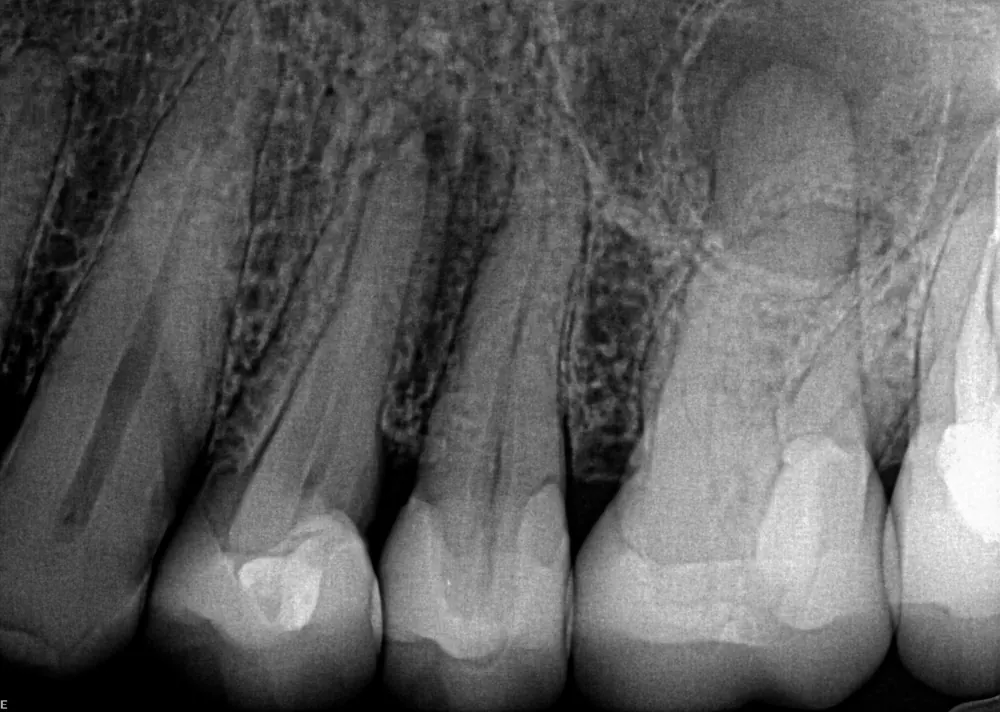
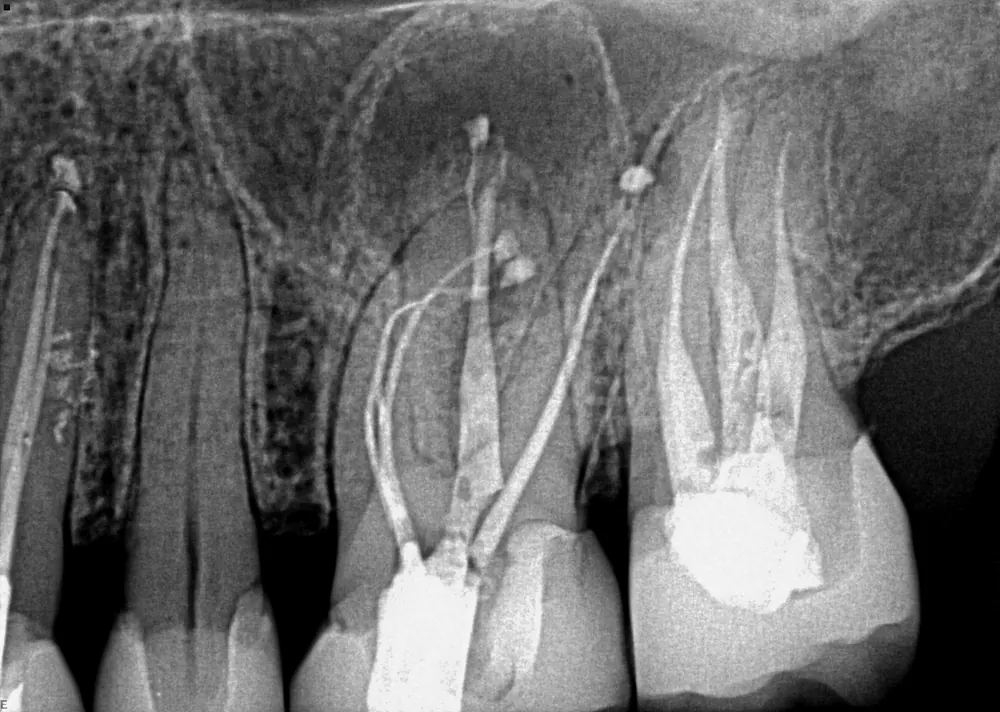
Root canal treatment of an upper molar, with each canal cleaned and sealed along its natural curve.
Case 3: Upper molar
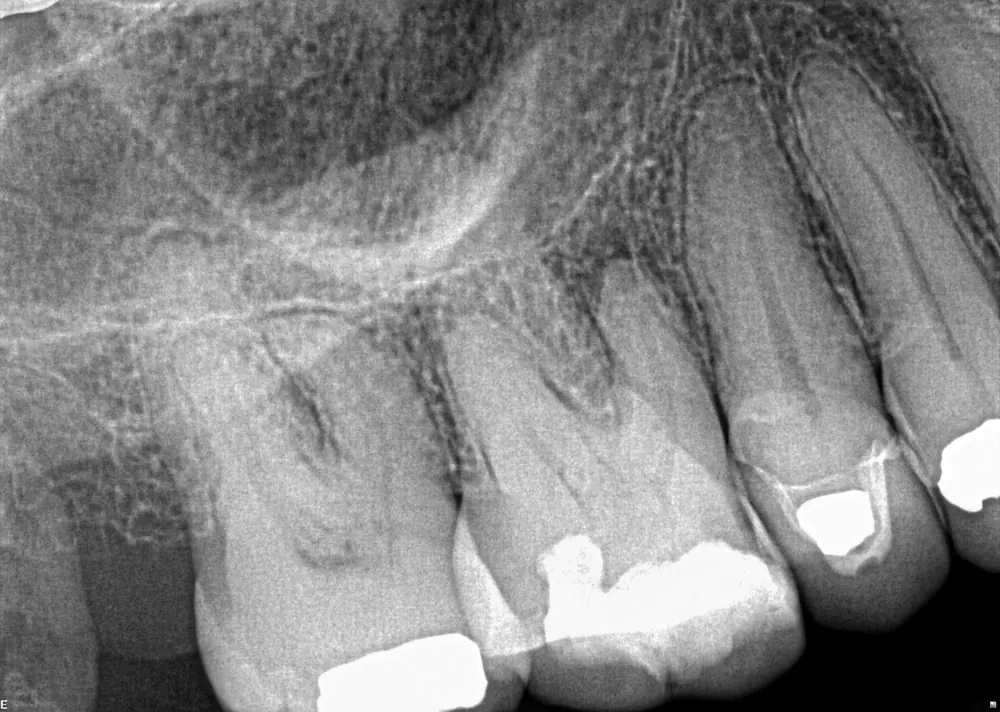
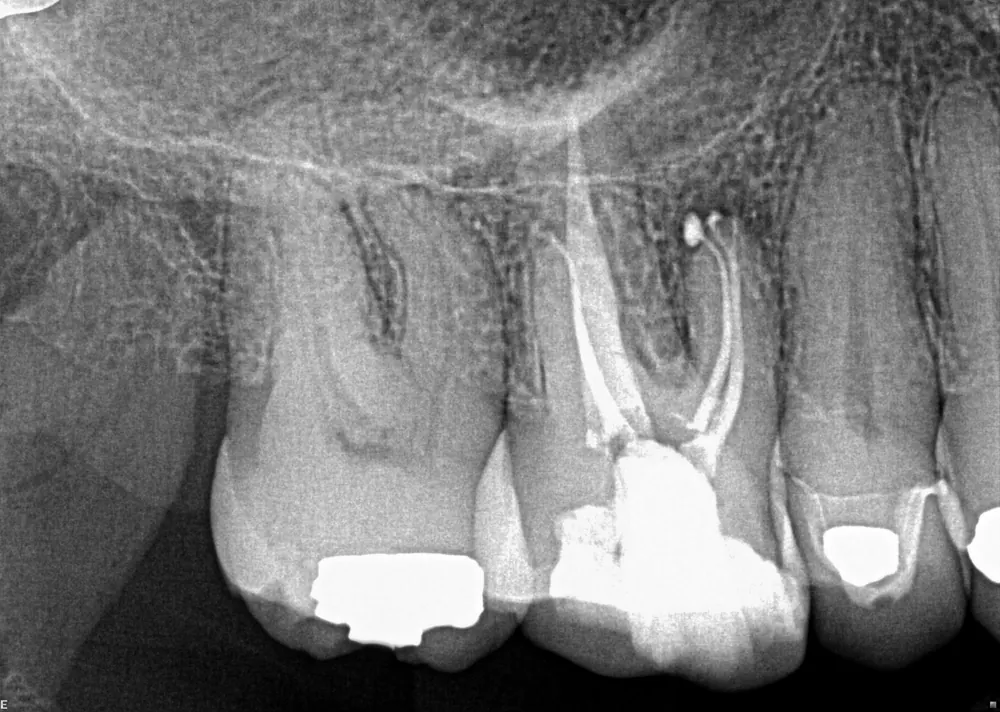
Treatment of an upper molar close to the sinus. The fine, curved canals were cleaned and sealed without enlarging them.
Case 4: Upper molar
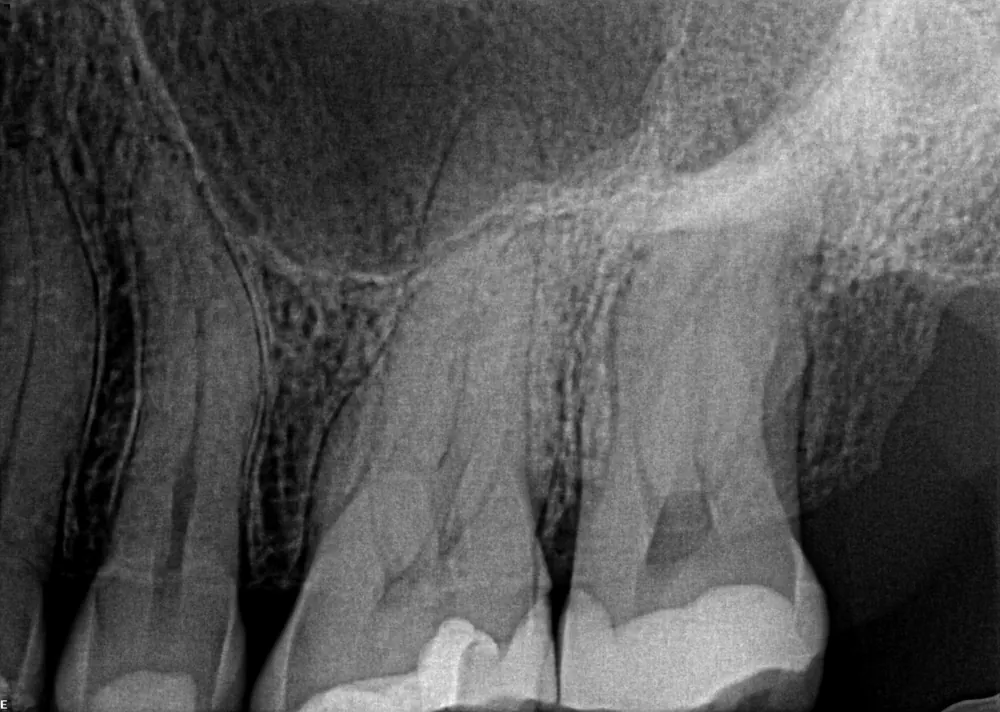
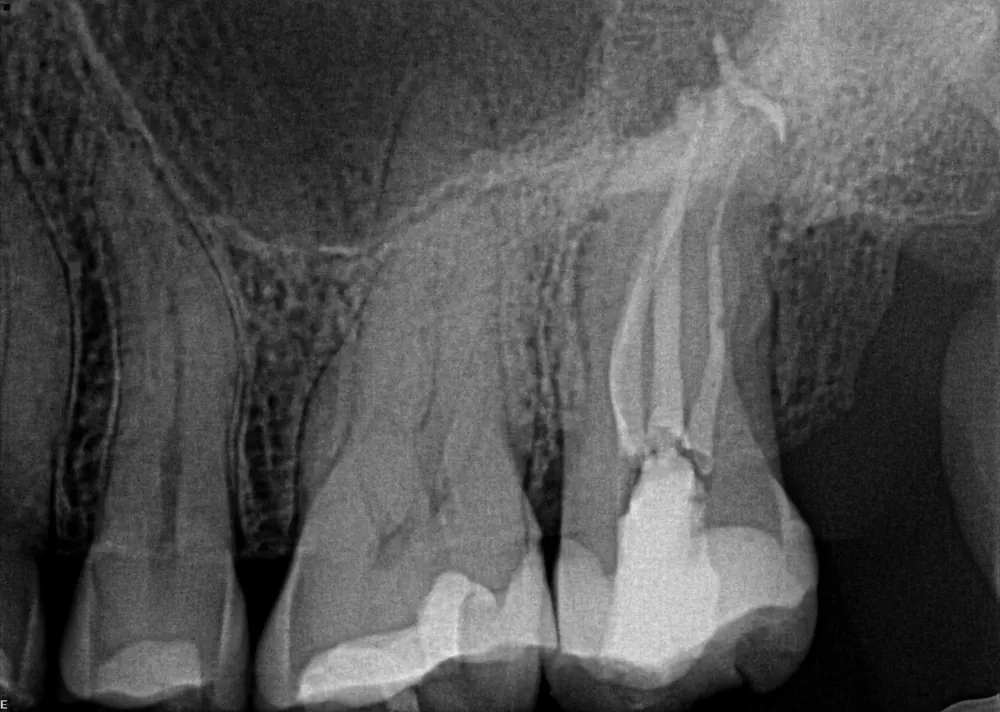
An upper molar with long, curved roots. Each canal was cleaned and sealed all the way to the root tip.
Seeing in 3D
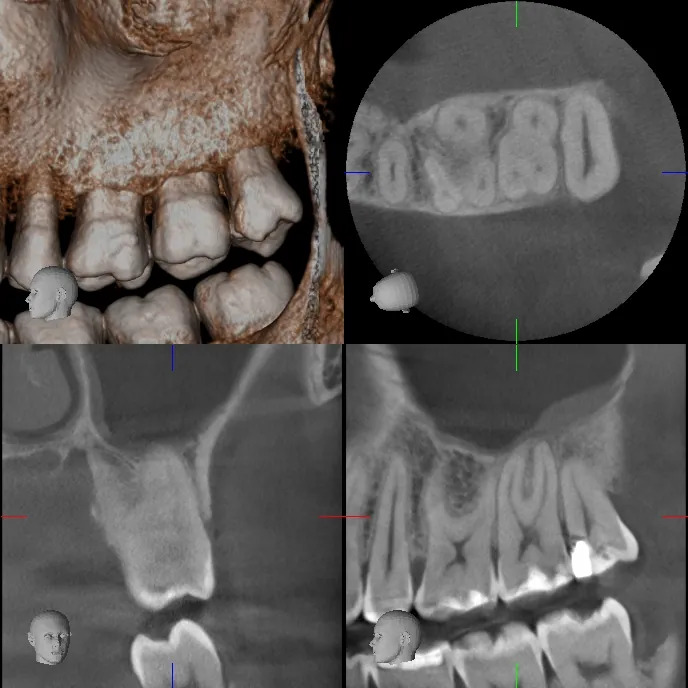
Images are from Dr. Warren’s patients and are shown without any identifying information.
Published case studies
Eight more of Dr. Warren’s cases are published by Plan B Dental, which uses them to teach minimally invasive technique to dentists worldwide. They include calcified canals, a lower molar with an extra distal root, and an upper molar with a sharply curved root.
Why minimally invasive matters
Fracture is one of the leading causes of tooth loss after root canal treatment, and removing more tooth structure inside the canals makes fracture more likely. Cleaning the canals without enlarging them keeps more of your tooth. More about Dr. Warren’s approach.